I don’t know about you, but I love me some interior decorating! It’s not something that I would get into as a profession (Interior designer), but it is a hobby I have started to take an interest in since I moved into my apartment in the summer of 2018. I spend a lot of my time at home when I’m not working and I really enjoy my own company, so it’s important to me that my apartment feels like home and is aesthetically pleasing.
Now that I have the freedom to decorate my own space to reflect my personality, I like to use social networks like Pinterest or Instagram, which by the way are great visual search engines, for inspiration. Let’s face it, life is expensive, and furniture is no different. However, if you’re anything like me and define yourself as someone who is frugal, then it doesn’t necessarily have to be. There are inexpensive alternatives you can check out, without having to break the bank. Sites such as Kijiji, Letgo, Thrift Stores (Salvation Army/Goodwill, etc.) and of course, my favourite, IKEA are great places to start.
The beauty of buying inexpensive pieces is that you have the ability to ignite your inner creativity. You’re probably thinking, where are you going with this, Abigail? Well, if you haven’t figured it out from the title of this post; it’s quite simple, do-it- yourself (DIY).
DIY is self-explanatory, it’s the activity of building, revamping, or repairing things without the direct aid of experts or professionals. By no means do you require to be highly skilled to commit to such activity. DIY projects can be very simple or complex, depending on what you are trying to achieve. Listen, if I can do it, you definitely can. There are tips and tricks, ideas, inspiration and how-to videos available online to help you get you started on your DIY project(s).
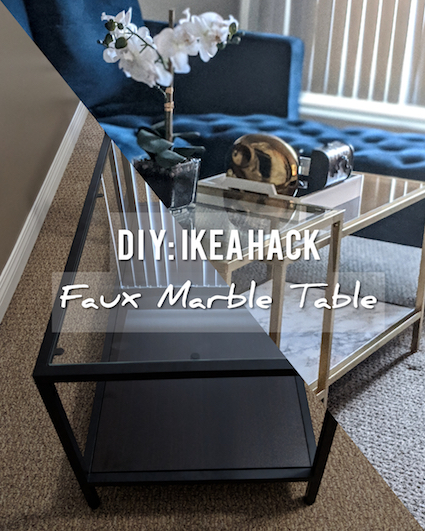
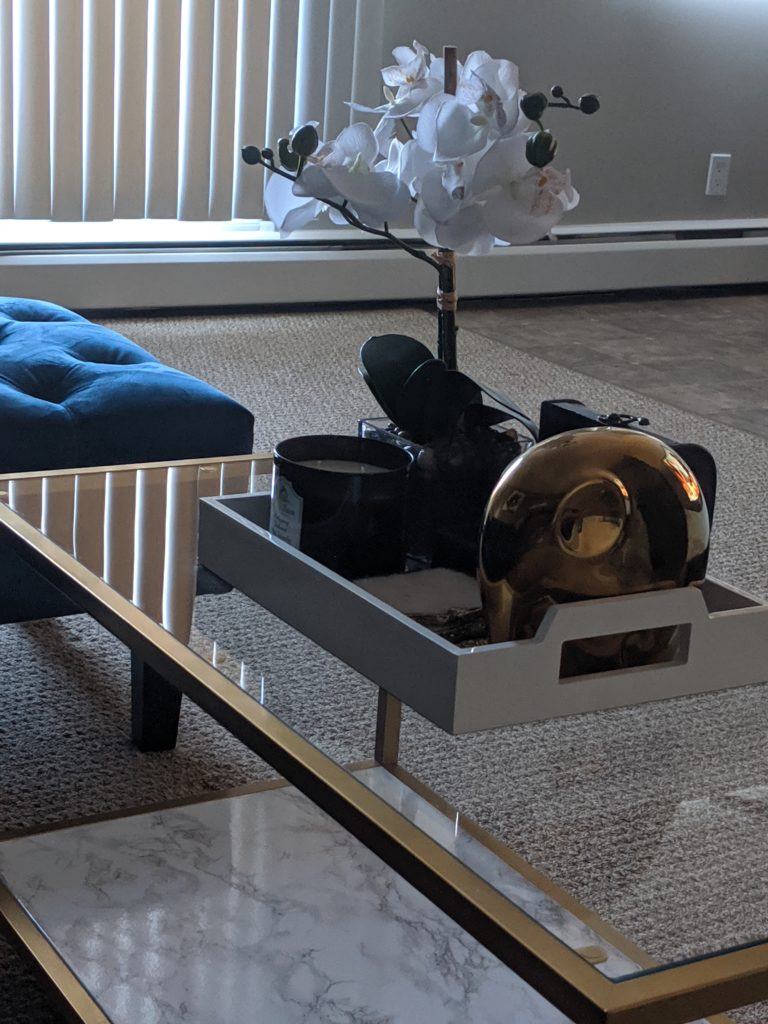
With that being said, I would like to share with you how I transformed this IKEA VITTSJÖ Nesting coffee table into a luxurious DIY faux marble coffee table.
How it all started…
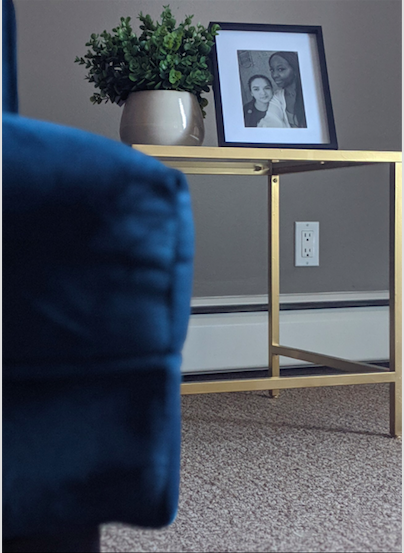
One of the first pieces of furniture that I purchased for my living room was the TODD Interchangeable Sectional Velvet Sofa in blue from Structube. I decided to go with this color because I thought it would contrast beautifully against my taupe coloured wall, setting a sophisticated tone to my living room. This sectional not only adds a luxurious feel and elevates the look of my living room, but it’s also the focal point that I would design my room around, while being careful not to draw attention away from it.
I wanted to add accents of gold to bring out my living room aesthetics and I thought purchasing a gold coffee table would really bring the whole look together. So that’s when I began my search for a gold coffee table, a rectangular shaped coffee table, at that! .. whew chile, those tables are not cheap – I’m talking $200.00 and up! There was no way I was going to spend my hard earned coins on a coffee table that cost that much.
As I mentioned before, I am frugal – I don’t like to spend above my means and I’m also rational. As I looked for other alternatives, it dawned on me that I could easily turn this into a DIY project. After browsing through Kijiji, Letgo for used/new coffee tables without much success, I went on IKEA’s website. Long and behold, they had EXACTLY what I needed to get started on my project.
Disclaimer: It’s important to make sure your project surface is clean of any dust or debris prior to priming and spray painting. This will ensure a smooth finish. I, however, overlooked this step prior to spray painting. Once I completed priming the table I had to postpone the project. After being stored away for months, I neglected to wipe down the surface of the table, which resulted in a ‘not so smooth’ finish. Nonetheless, I’m still pleased with the final product of my perfect imperfection.
Items You’ll Need:

VITTSJÖ Nesting tables 
Rust-Oleum Painter’s Touch 2X 12 oz. Flat White General 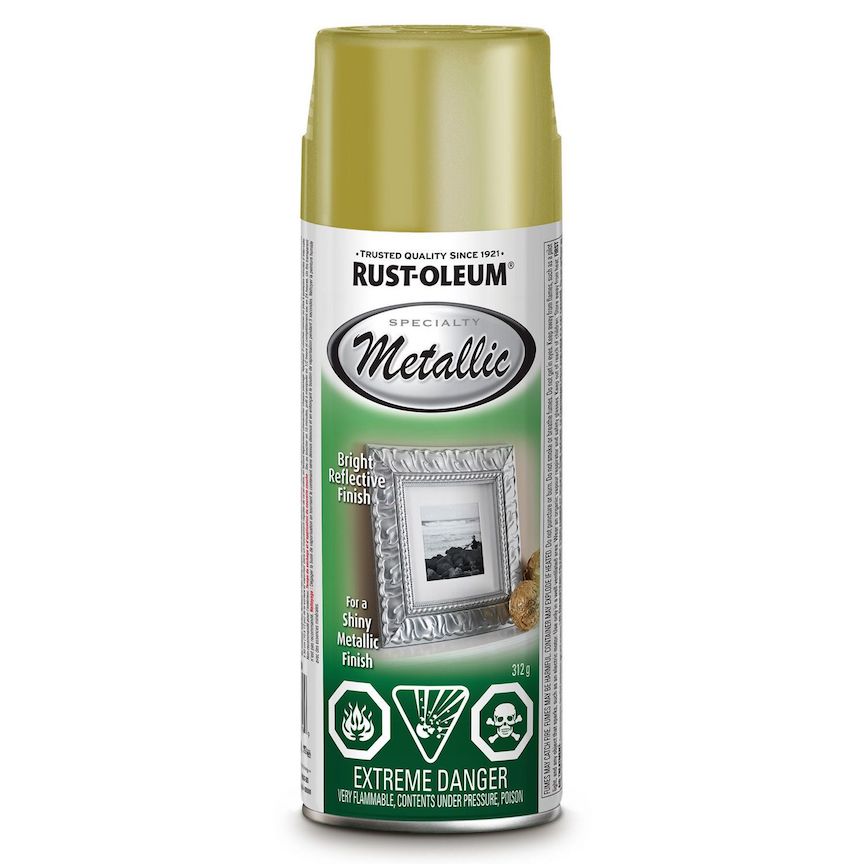
Rust-Oleum Metallic Finish – Gold 
Optional: Decorative Self Adhesive Film (Contact paper) of your choice.
Step 1: Purchase
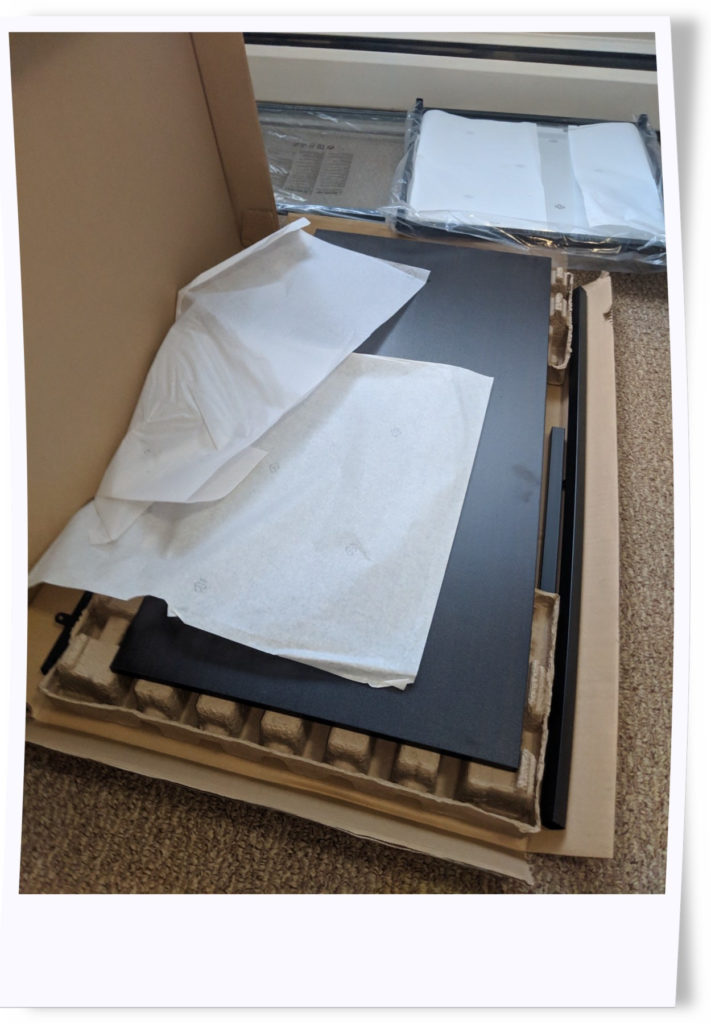
I purchased the VITTSJÖ Nesting tables from IKEA for $79.99 (before taxes). It came in a set of two, in the color brown-black and table topped in tempered glass. Honestly, this was such a good deal, if you ask me. You’re you getting two tables for the price of one, in some cases, it can even be more than that depending on the style/finish. The thing that I love about this set is that it’s versatile; in the sense that it can stand alone and serve as a nightstand, side table, lap desk, coffee table, etc. and the fact that it can stack together to allow the small space(s) in your home to appear larger.
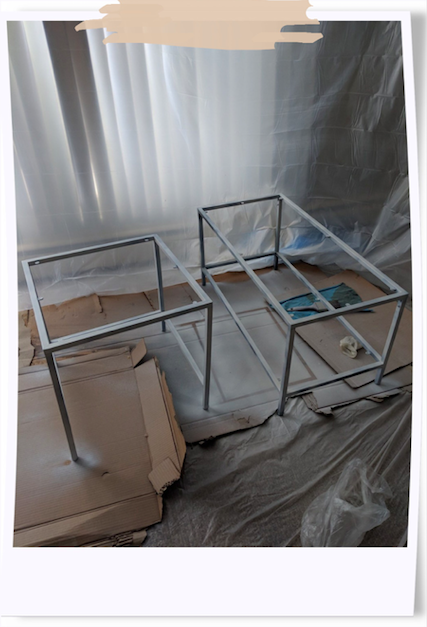
Step 2: Assemble
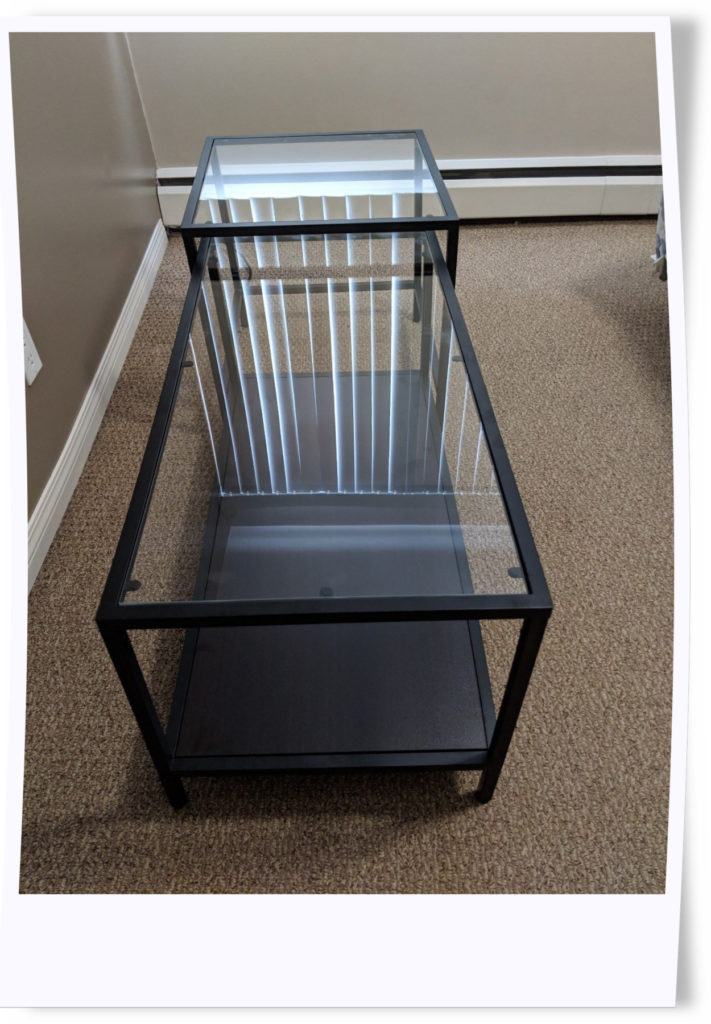
This was by far the fastest and easiest piece of furniture I have ever had to assemble. The first thing I always do prior to assembling any furniture is prep my workspace. Not only does it create a safe environment for me, but it also mentally prepares me for what I’m about to do. After opening the package and taking out all the parts, I always check for any damages or defects. I then skim through the illustrated instructions for additional tools that may be required for the assembly process.
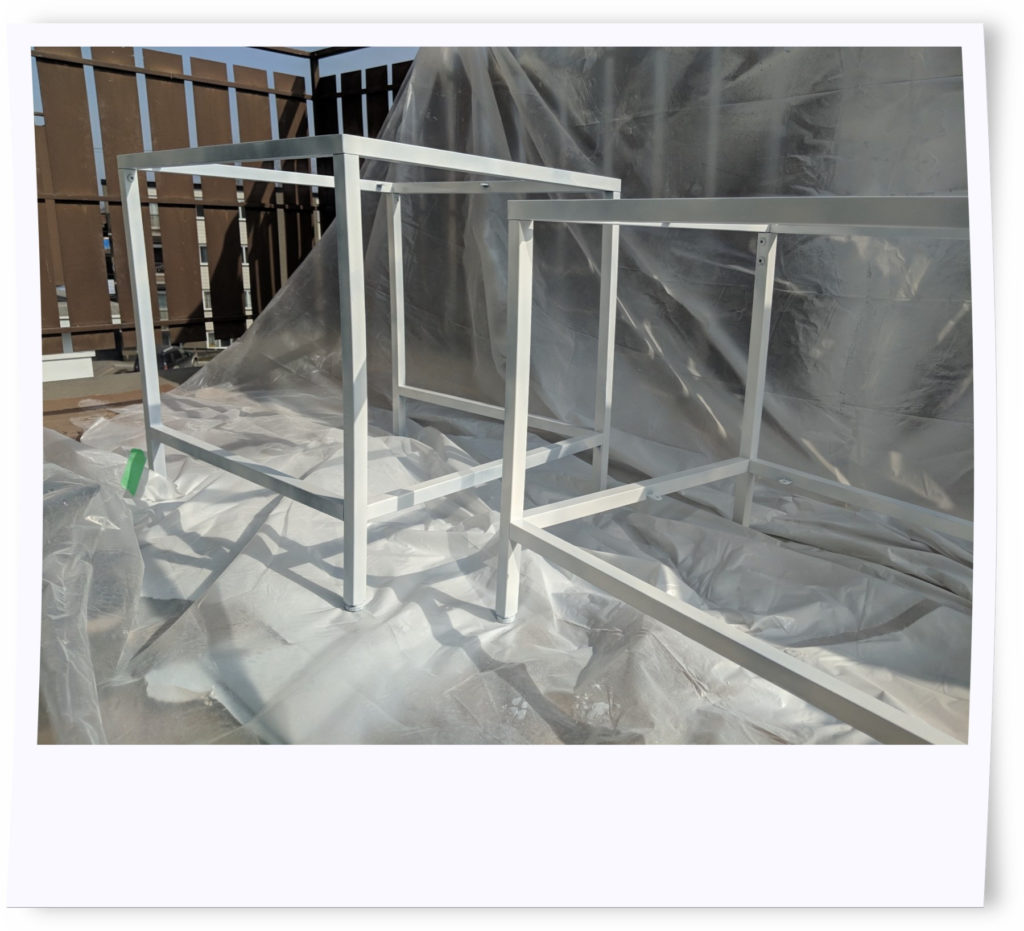
Step 3: Prime
Some will skip this step, but I think this step is important. Applying a primer prior to spray painting helps to ensure that your spray paint will have a nice even finish. Otherwise, you may need several coats of spray paint to get the coverage you desire. The primer I used was the “
Rust-Oleum Painter’s Touch 2X 12 oz. Flat White General Purpose Spray Paint” (Ultra Cover Paint + Primer) which can be purchased at any Hardware store or even Walmart. I purchased mine at The Home Depot. Initially, I purchased one can, but it wasn’t sufficient for a second coat; so, I ended up making another trip, this time to Walmart. It’s not mandatory that you apply two coats, but I wanted to ensure that I was getting my desired coverage for even results.
Step 4: Spray Paint
After allowing the primer to completely dry, I then spray painted with Rust-Oleum Metallic Finish – Gold (also purchased from The Home Depot) ensuring that the entire project was evenly coated. Allow project to dry completely prior to touching or moving it. Once it’s dried, place the tempered glass table tops on and voila!
Step 5 (Optional): Applying a Decorative Self-Adhesive Film
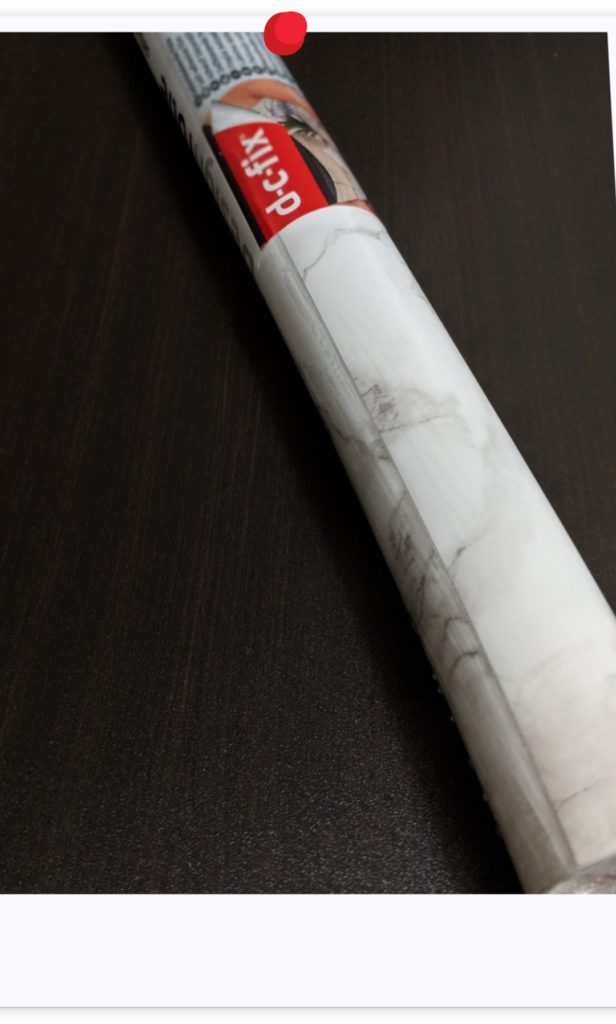
This step is totally optional. If you’re satisfied with the finish you achieved in step 4, you can skip this step. However, if you’d like to add an extra something, something; glam, class, elegance, etc. to your home then this step is for you. Originally, I had planned to just spray paint the table gold, but all that changed when Youtuber, Kathlyn Celeste’s $300 Living Room Makeover on a Budget! DIY Decor video appeared in my recommended playlist on YouTube, which sparked the idea of using a decorative self-adhesive film.
First, it’s important that the panel, which is the surface of the film will be applied to, is clean; free from dust and greasy substances.
Measure – I measured the length and width of the panel using a ruler and then marked the dimensions of the film to the backing paper adding an additional 2-3 cm, in the event I made any errors in measurement. I’m not sure if all self-adhesive films have a trimming guideline on the backing paper for precise measurements, but the one I purchased off Amazon did and it was helpful. Finally, I proceeded to cut with scissors.
Application:
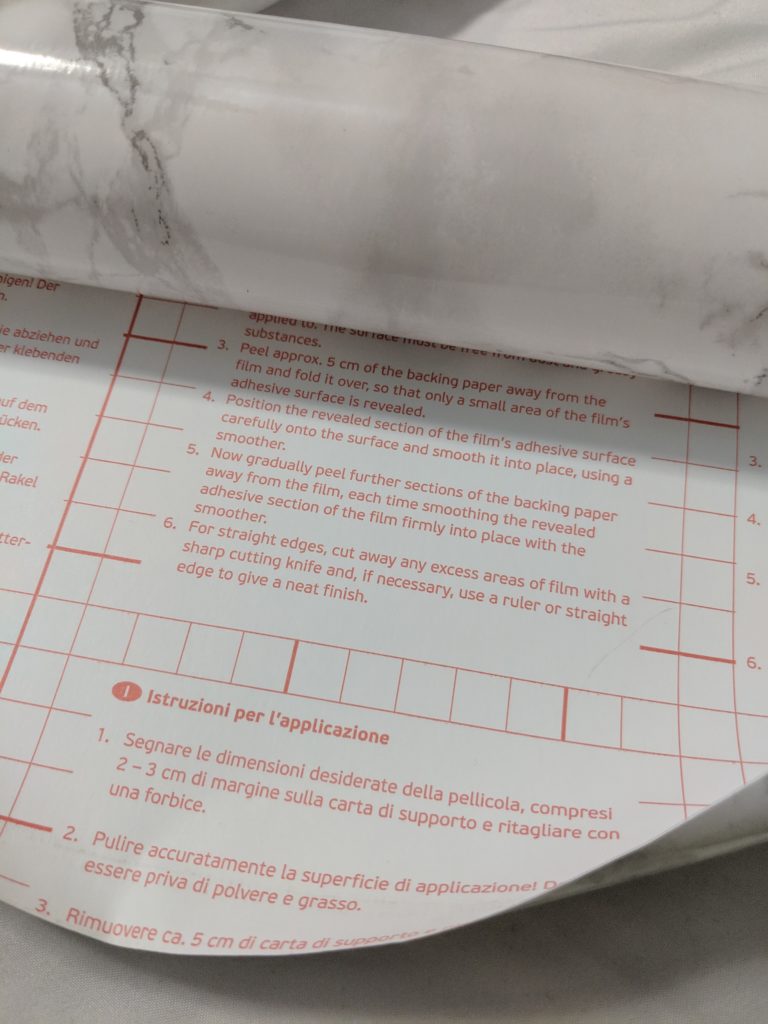
So here is where it gets a bit tricky (well at least for me it did). Patience is crucial during this application process. What I did here was place the film to cover the surface (panel) with the backing paper still on; smoothing it flat and making sure that it fit the surface properly.
Peel – With the film flatten, smooth and properly fitted, I started peeling. It’s required that you peel approximately 5 cm of the backing paper away from the film and fold the backing paper over, so that only a small area of the film’s adhesive is exposed.
Then, position the exposed section of the film’s adhesive surface carefully to the panel and smooth it into place using a smoother. I didn’t have a smoother, so I ended up using my debit card (lol) for this process working it from side-to-side. The purpose for using a smoother or any thin flexible object is to flatten out any wrinkles and/or to let out any trapped air that forms as a bubble.
I continued peeling off the backing paper slowly, revealing more of the adhesive backing and smoothing the surface and around the edges with my debit card until the panel was entirely covered. As for the corners, in order for me to create neat corners, I folded the excess film creating a demarcation of a diagonal line. Then using scissors, I cut along the line and overlapped one edge of the film to the other. If you don’t have the patience for that, you can trim off any excess film with scissors.
Assemble Cont’d
Now that the contact paper is applied to the panel, I was able to screw and secure my now classy marble panel to the base of the coffee table and place the tempered glass table tops on to complete the look.
All Done!

I really enjoyed this DIY project: although it requires a lot of patience, it was simple to do. On top of that, I achieved the aesthetic look I was going for.
In the comments section below, let me know what you think! And, if you’ve completed any DIY projects of your own, please share what you’ve done and what/who inspired you.
Until next time!
Leave a Reply